# Share data with other apps
Share data across apps and portals. Users can then read, edit, or add new records from other apps.
Updates are shown on both data grids. If there are linked fields and you hope to update those fields on the shared table, share this table with the app as well. They can be hidden from the [navigation](https://docs.stackerhq.com/stacker/customize-layouts/navigation#set-order-of-navigation) so end users do not see the table.
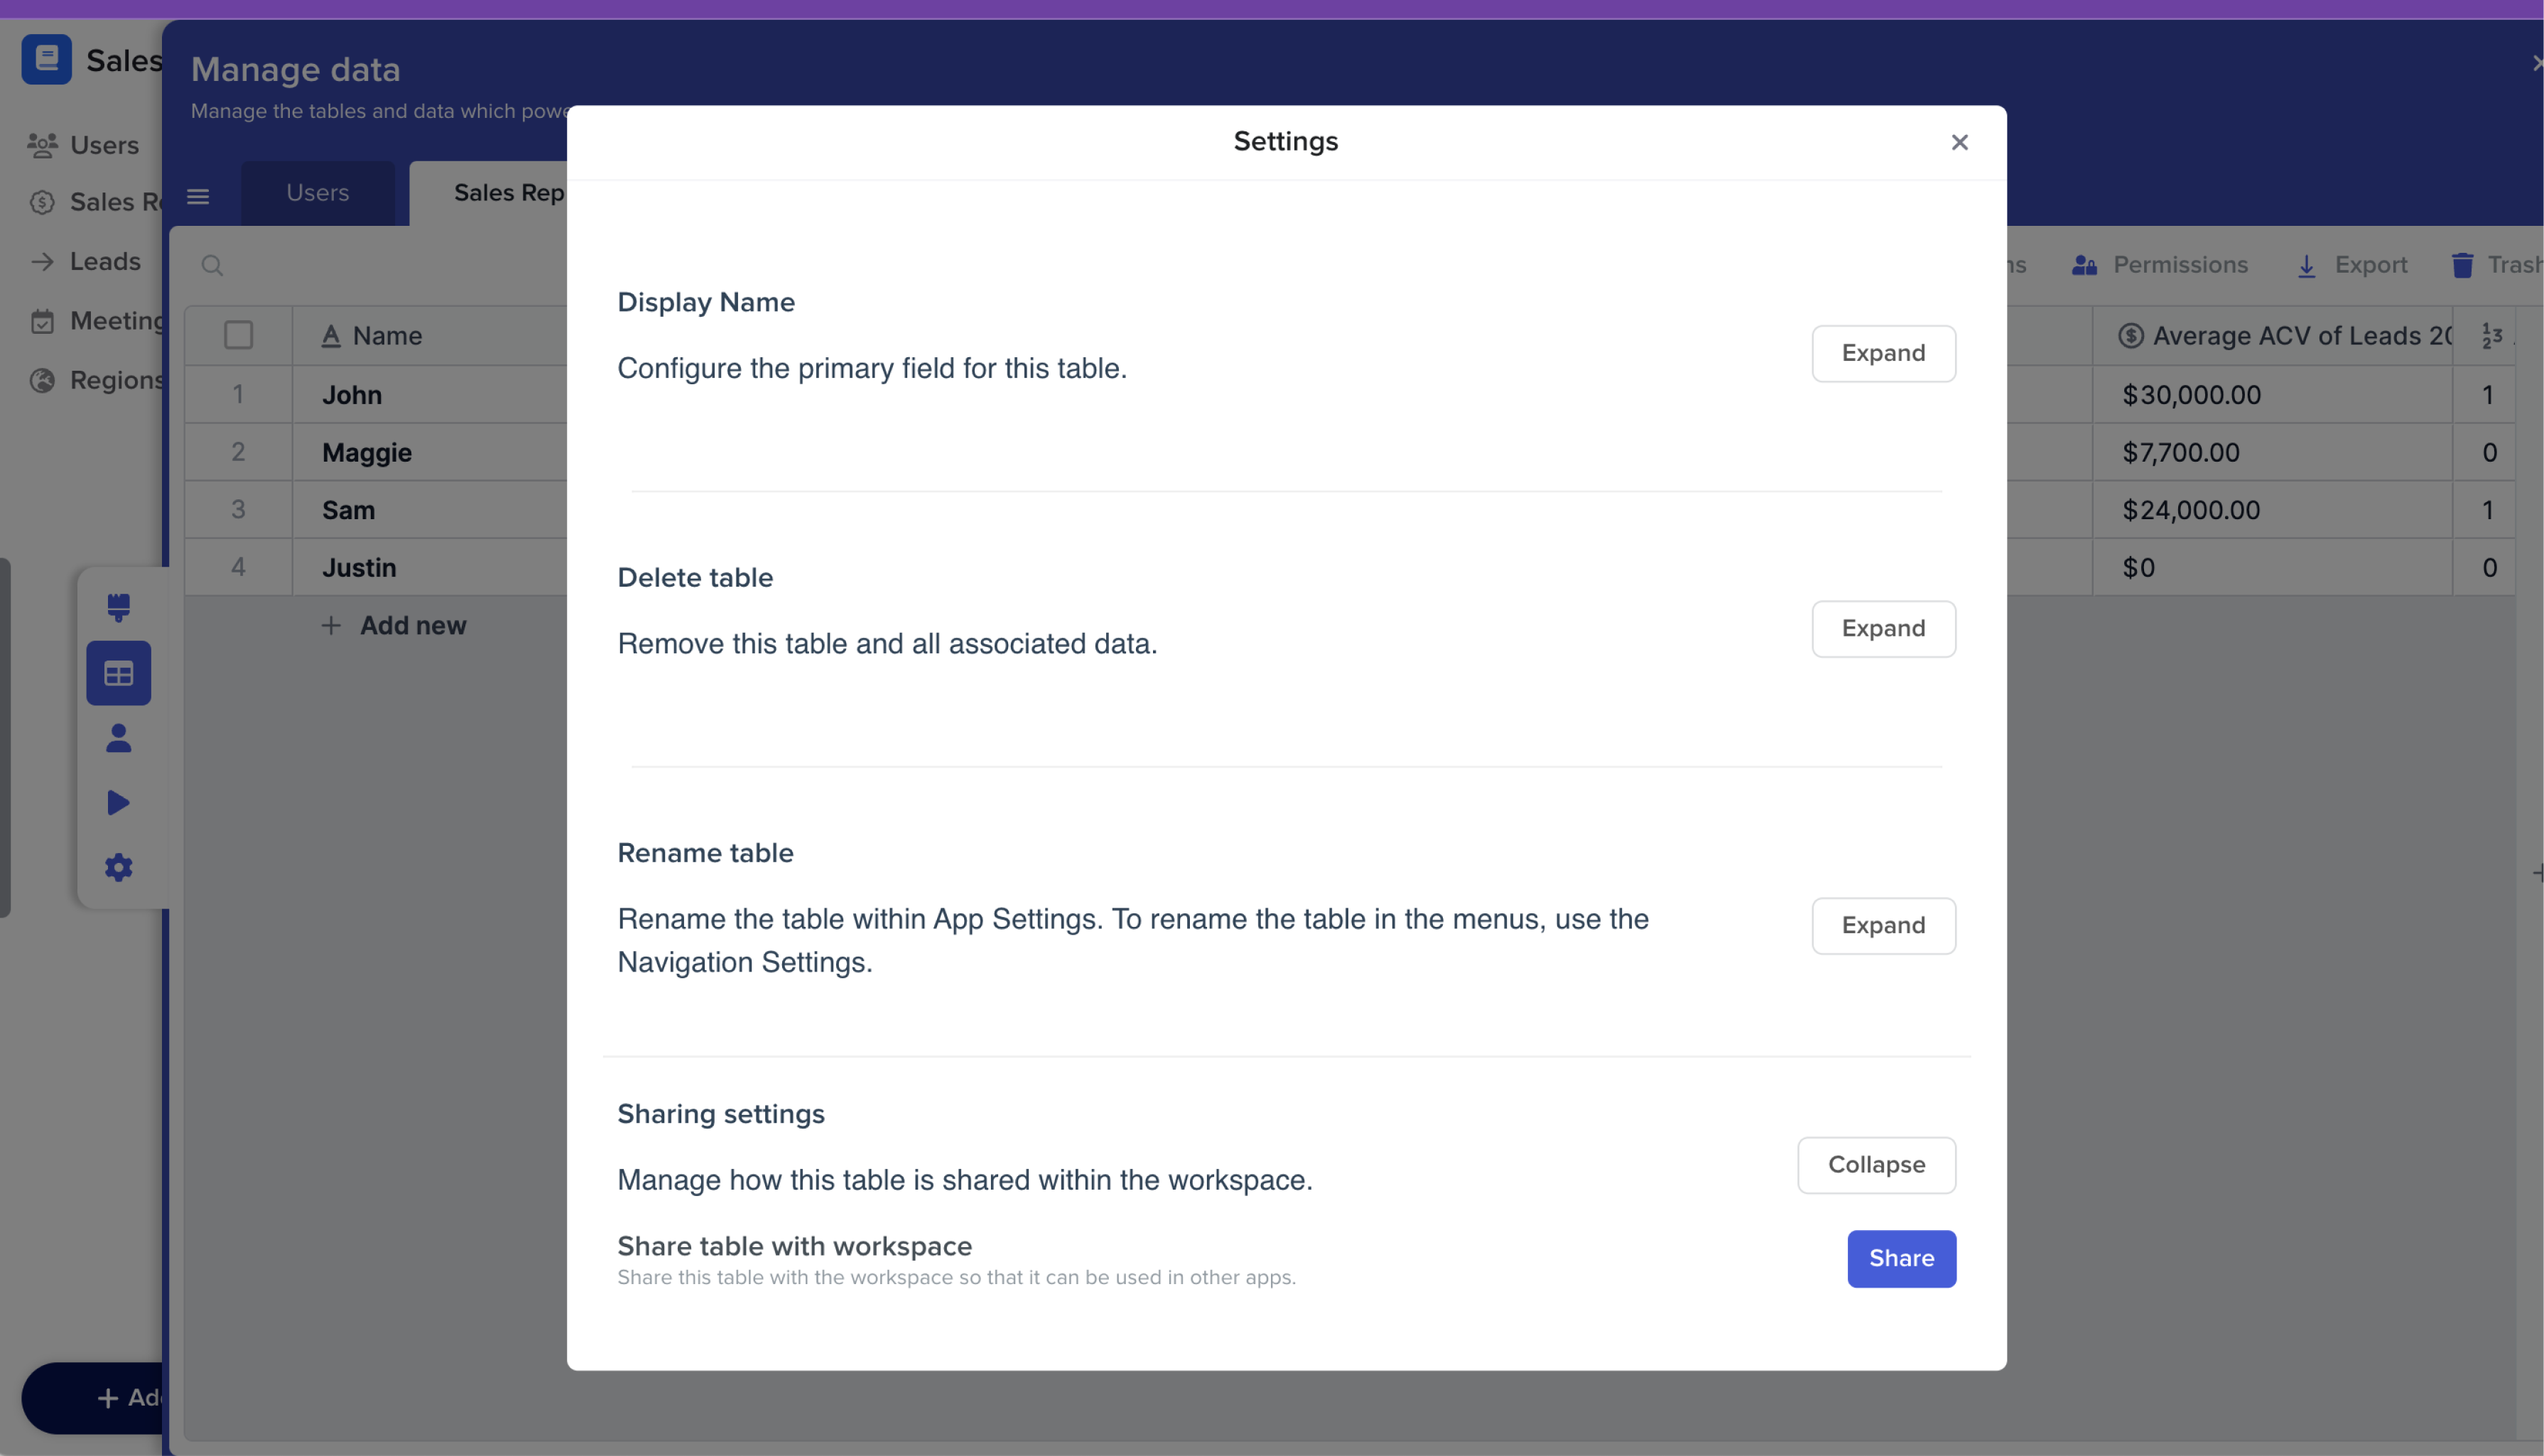
### **To share a table**
1. Go to **Manage Fields and Data**
2. Select **Settings**
3. In the **Share Settings** row select **Expand**
4. Select **Share**
### **Add a shared table**
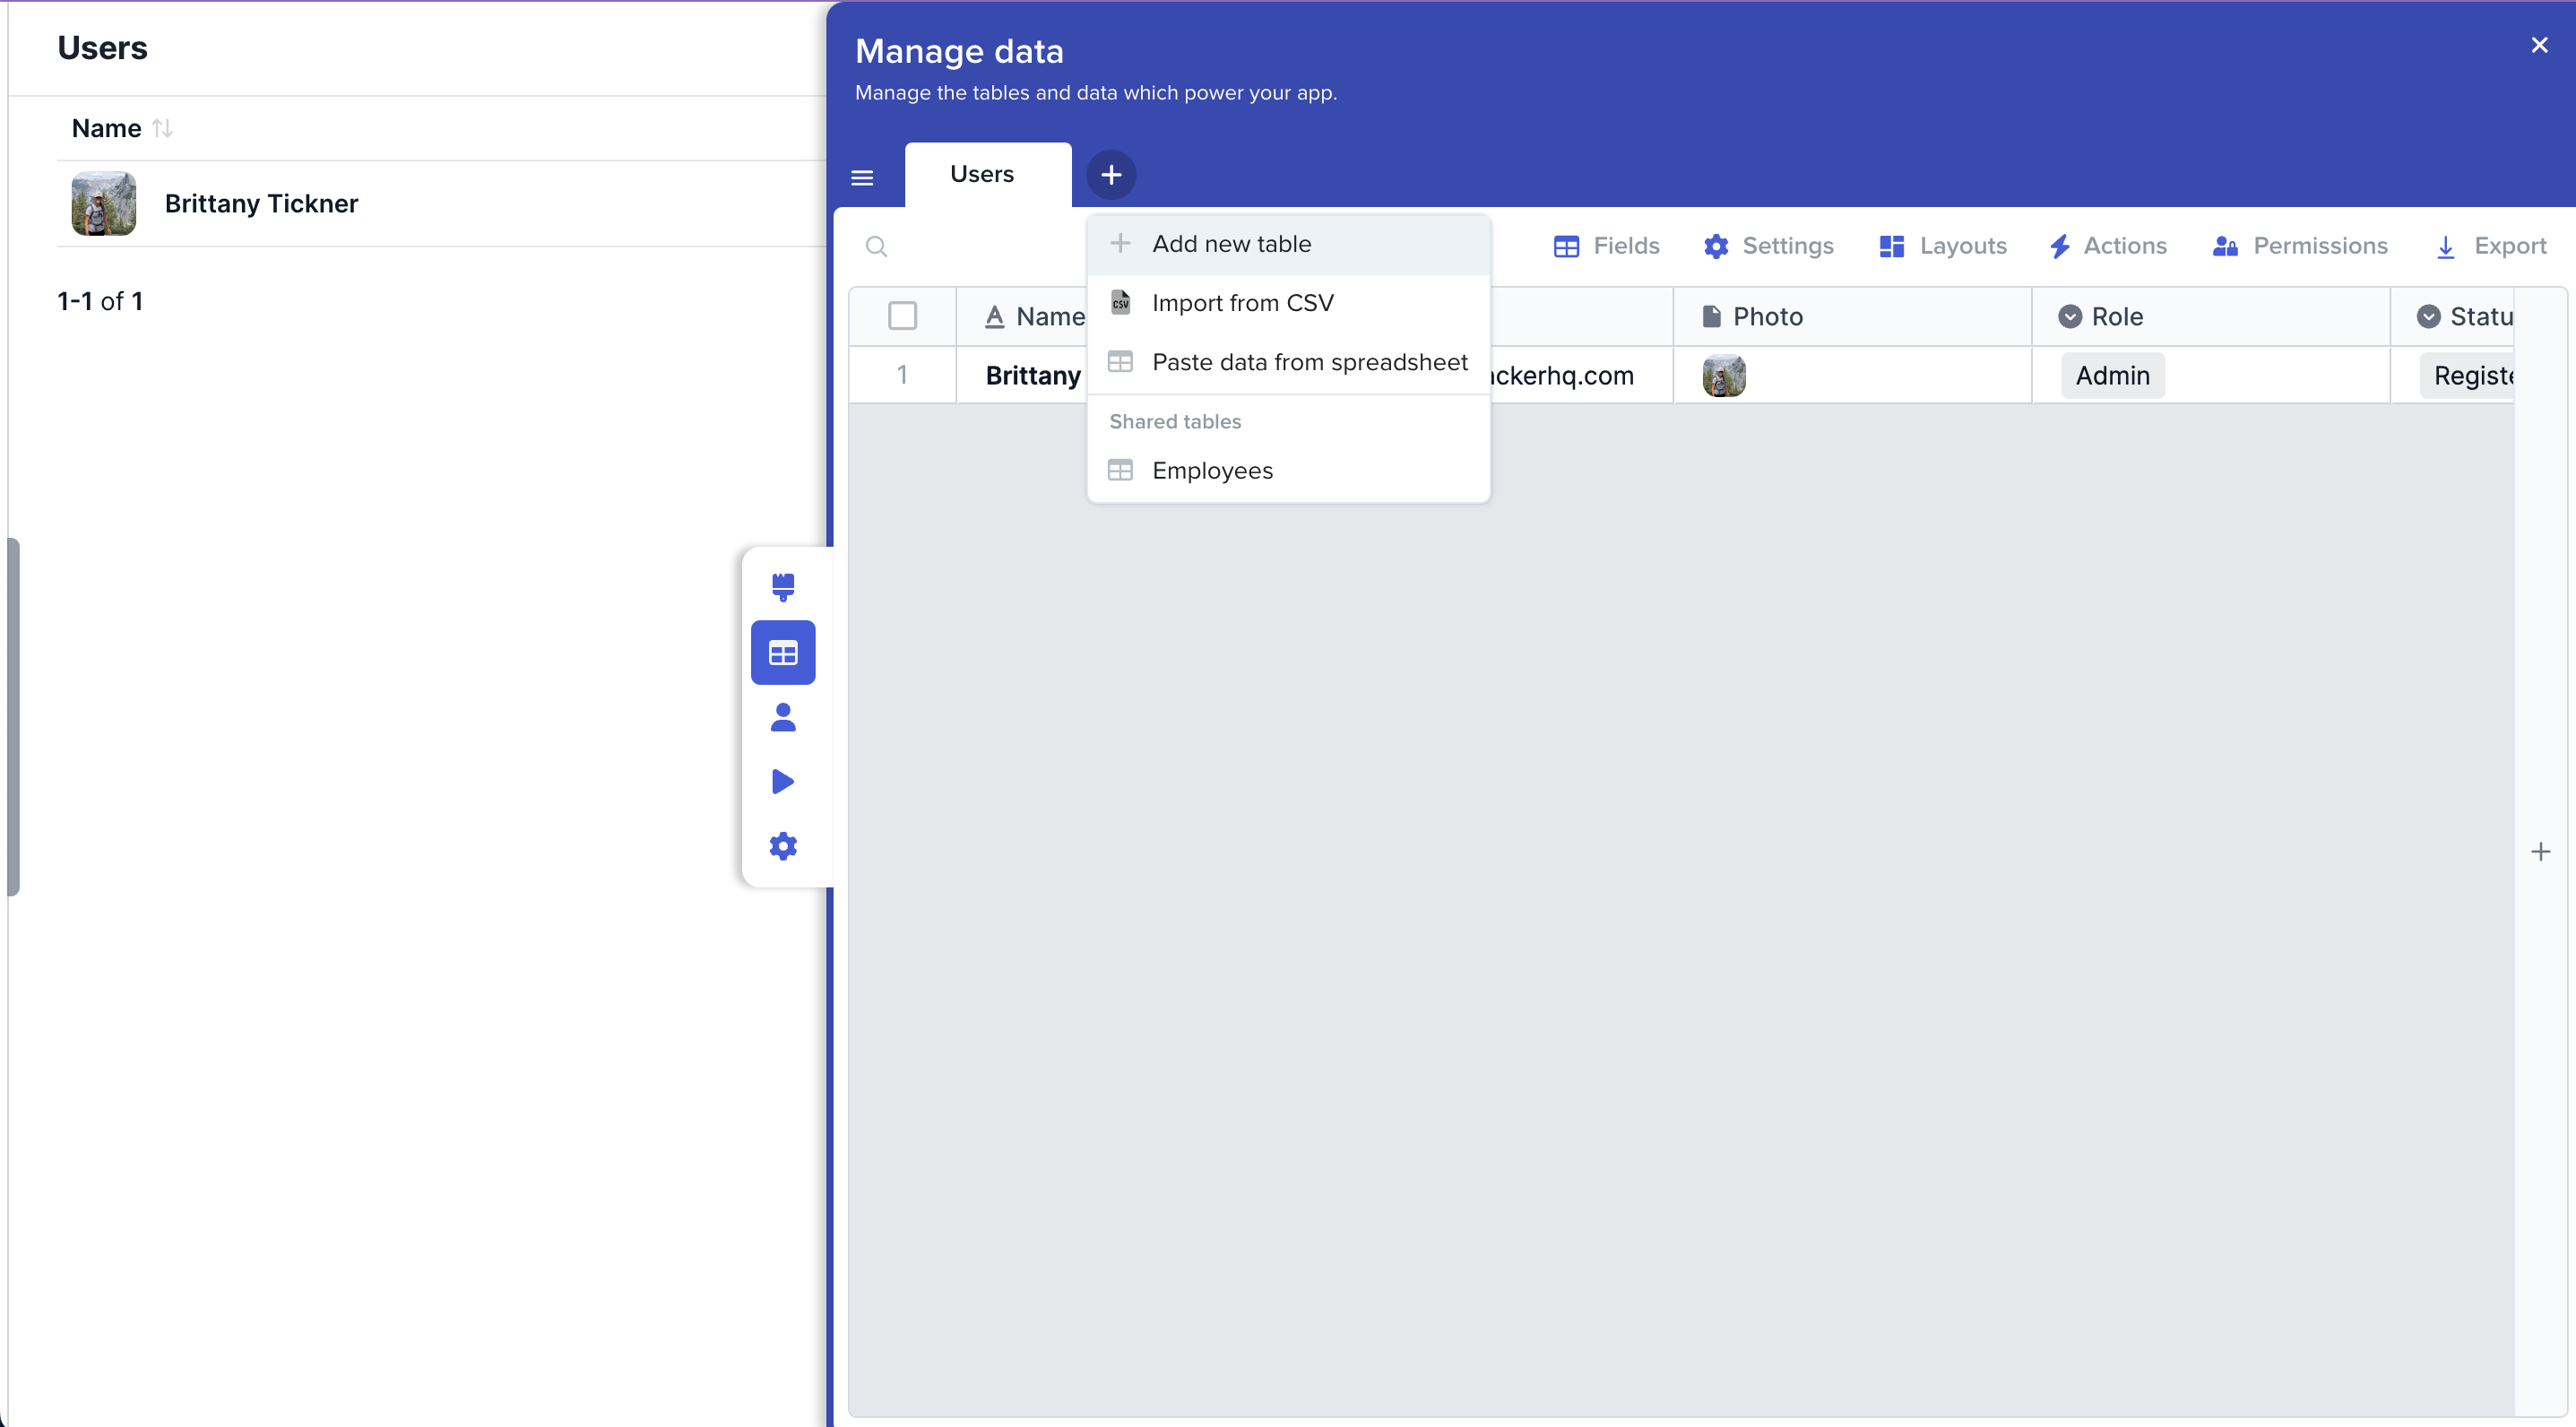
1. Go to the app you want to add the table
2. Select the add table icon
3. Choose the name of the shared table
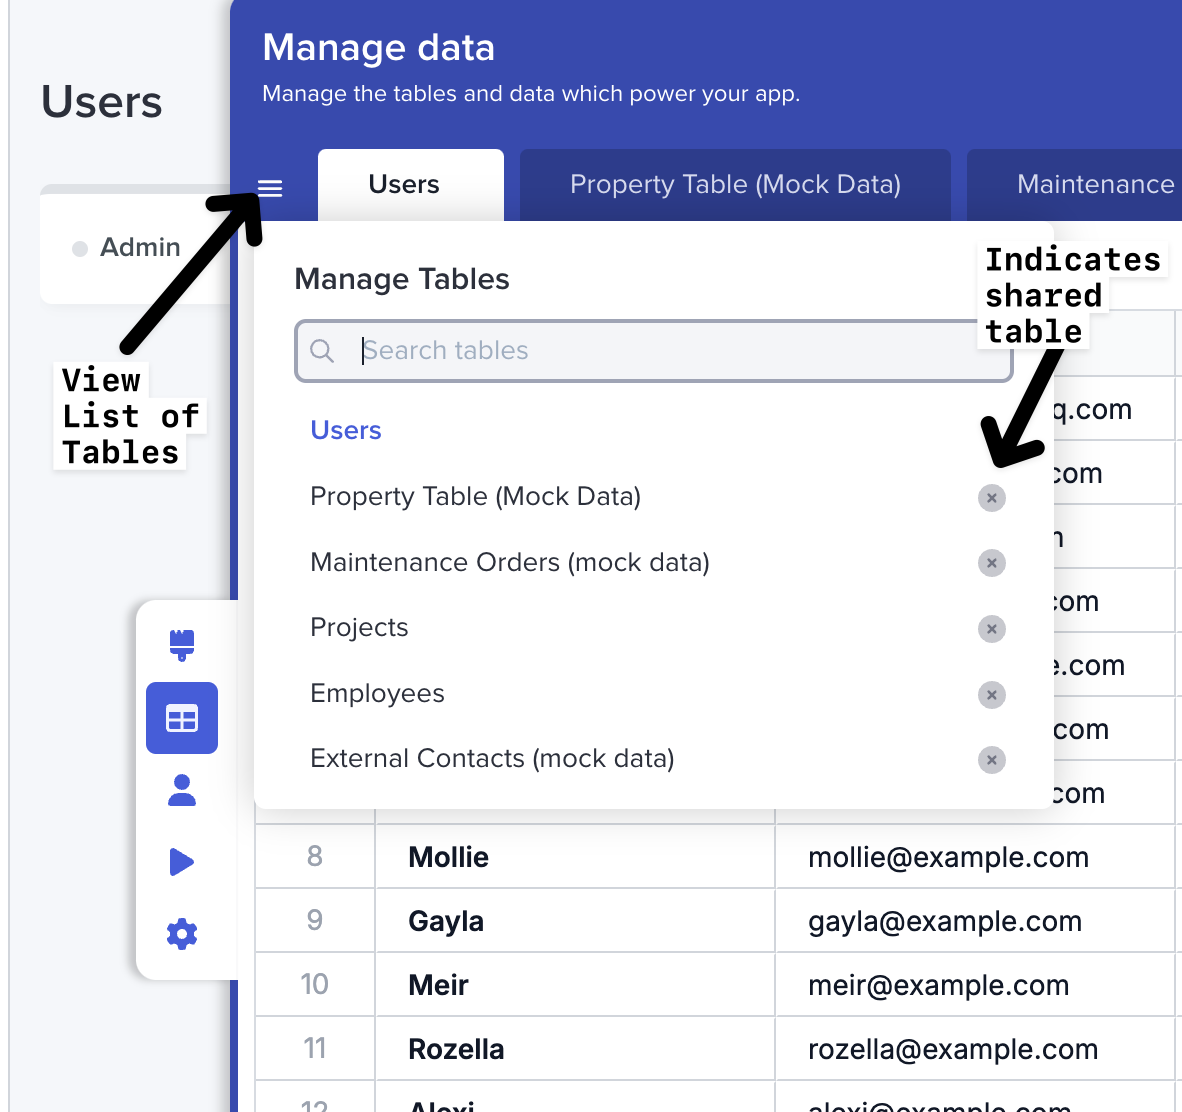
In this example, my shared table is called **Employees:**
{% hint style="info" %}
Identify a shared table by selecting the menu icon on Manage Fields and Data
= Shared with the app and can be removed or is being shared but not used by another app
No trash icon = table is being shared in another app or portal
{% endhint %}
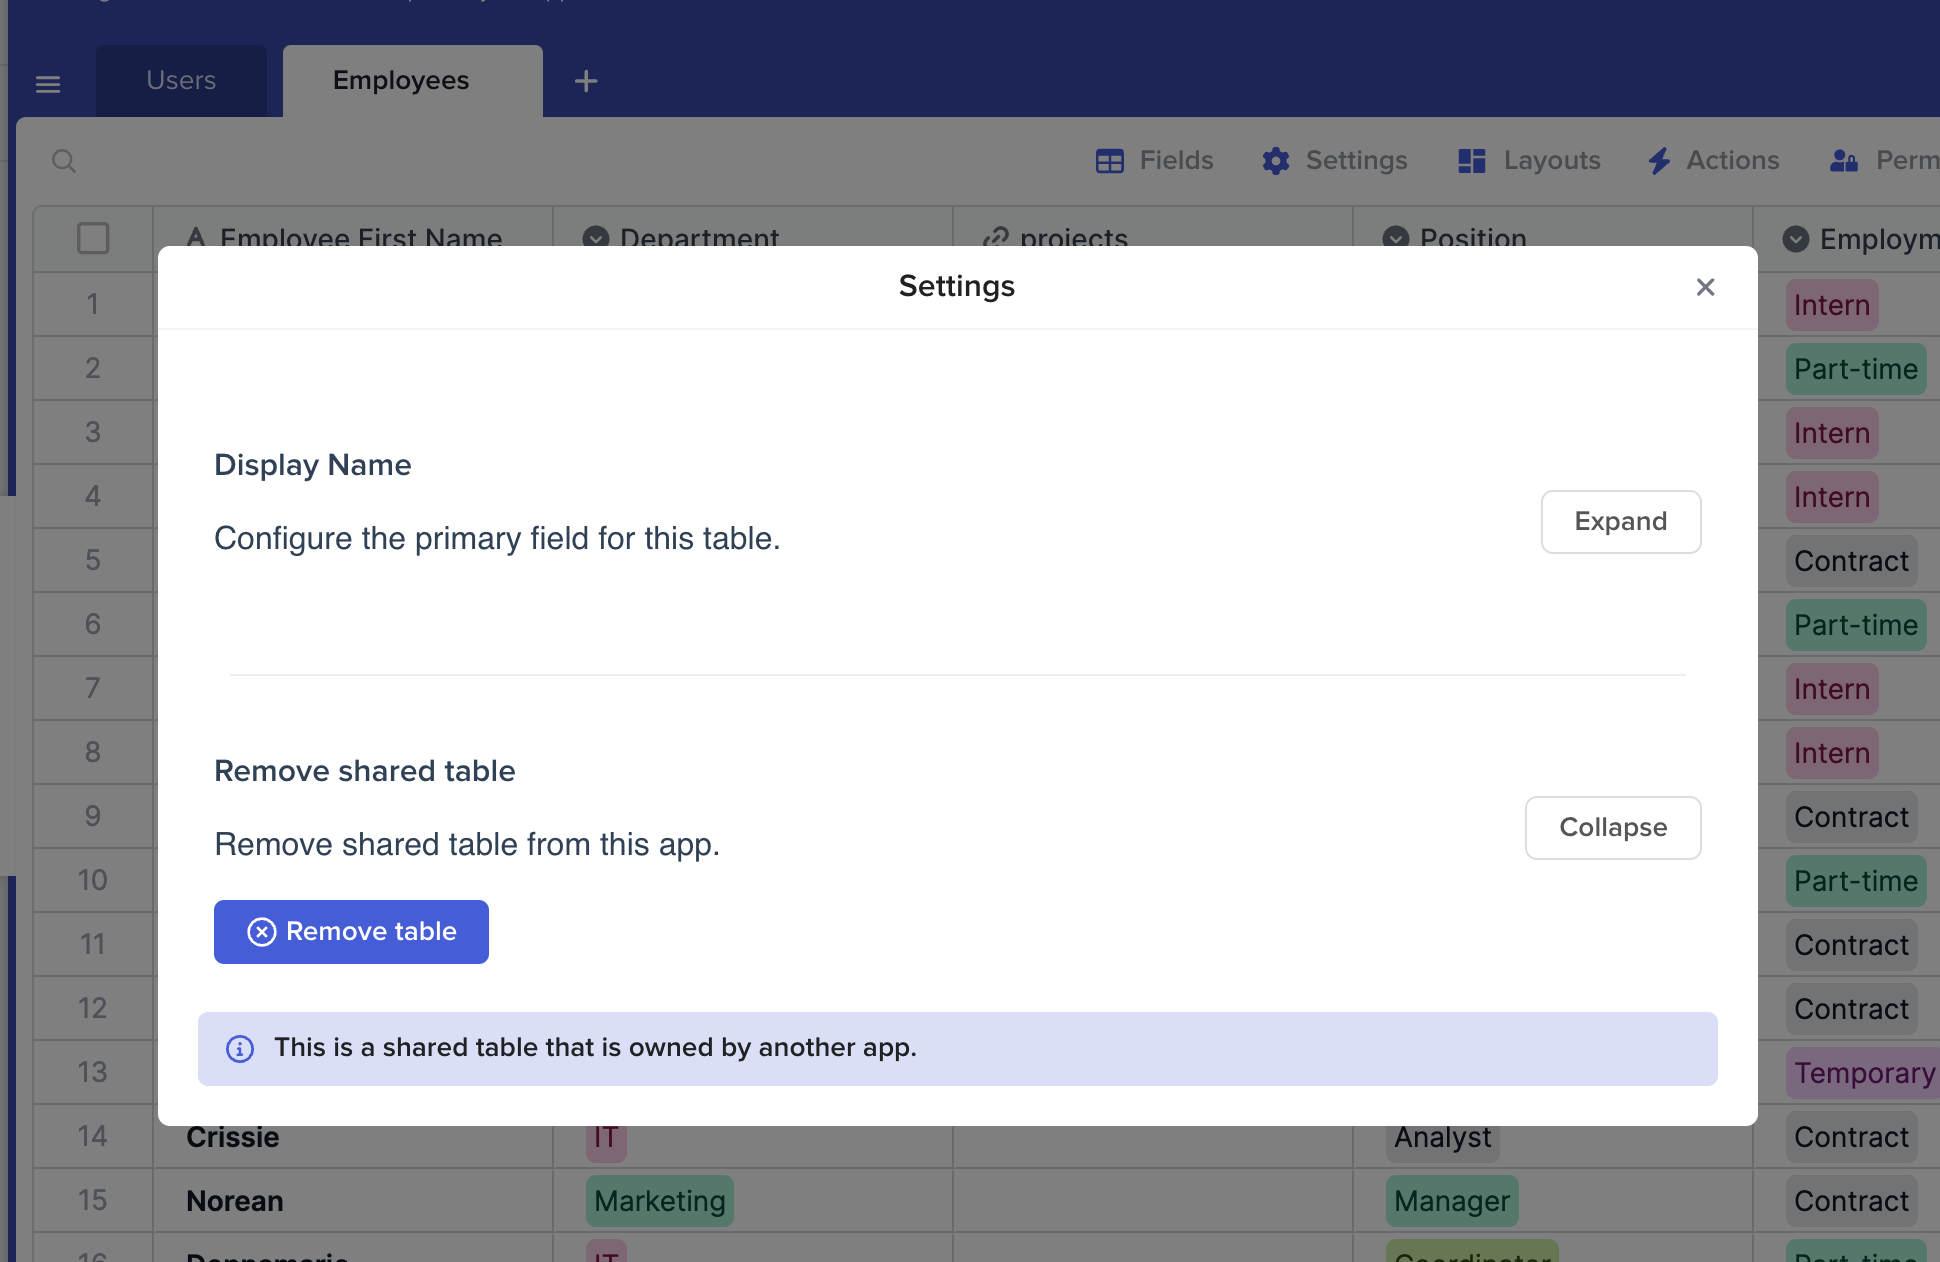
### Remove a shared table
1. Go to **Manage Fields and Data**
2. Select **Settings**
3. Expand the row **Remove shared data**
4. Select the button that says **Remove Table** and **confirm**
{% hint style="warning" %}
The table can't be deleted or unshared in the original app until it's been unshared from all apps.
{% endhint %}
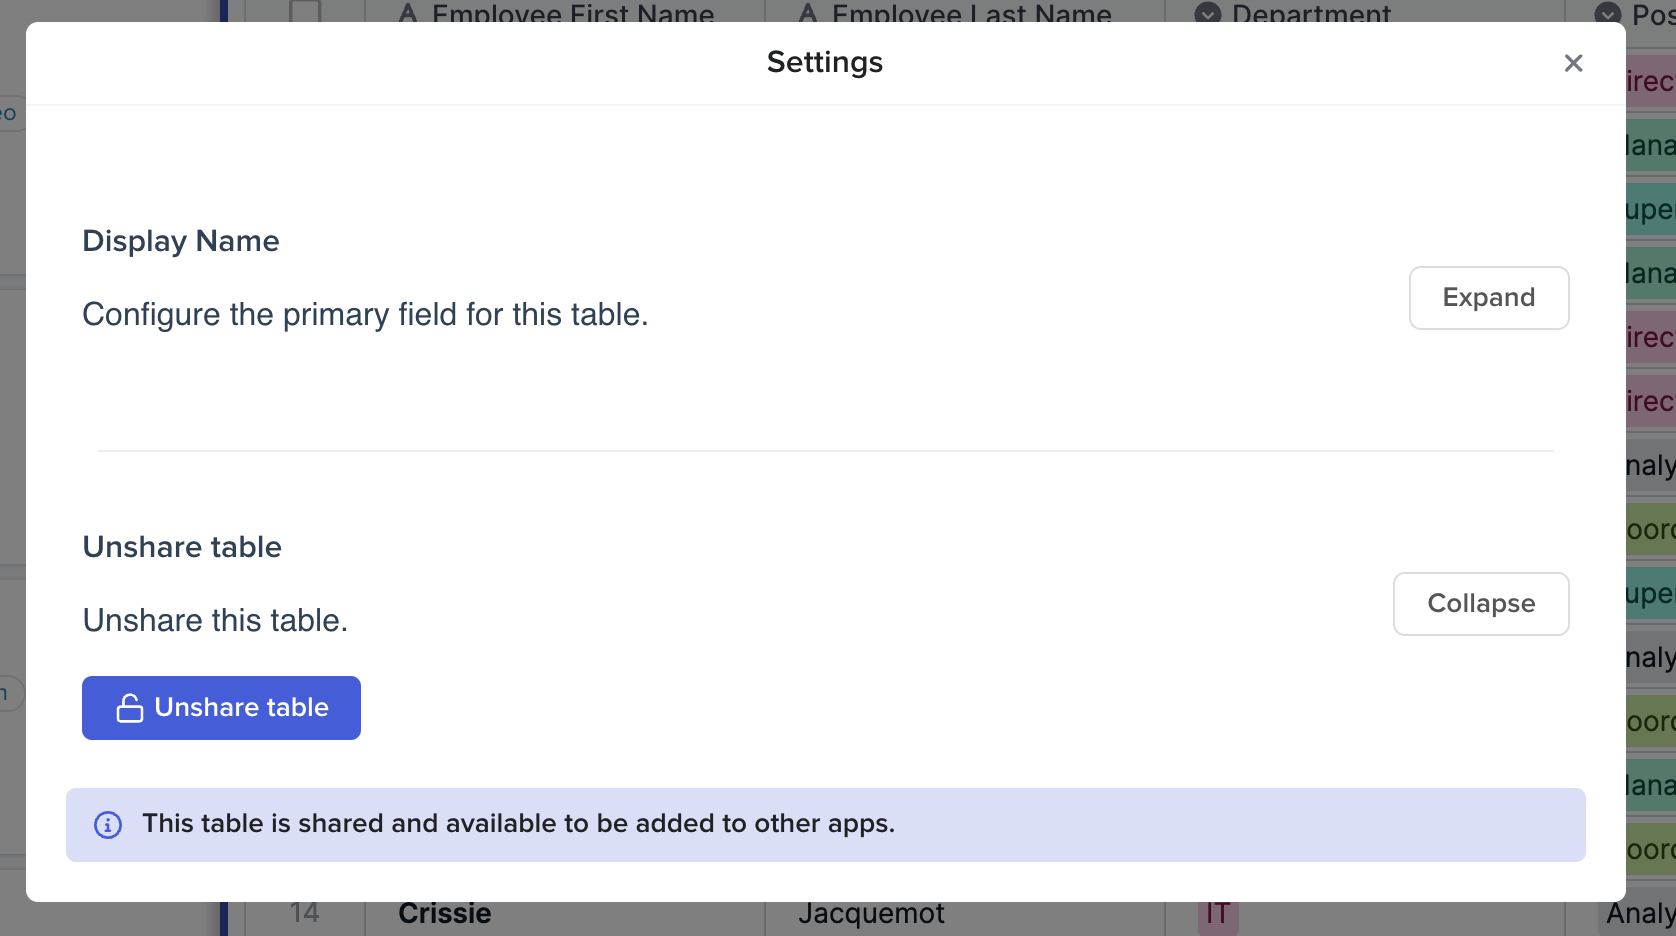
### **Unshare a table**
To unshare a table, all apps using it should remove the imported table first, then the table can be unshared from the original app.
1. Go to **Manage fields and Data**
2. Select **Settings**
3. Expand the row **Unshare Table**
4. Select **Unshare table** and **Confirm**
 **Manage Fields and Data**
2. Select **Settings**
3. In the **Share Settings** row select **Expand**
4. Select **Share**
**Manage Fields and Data**
2. Select **Settings**
3. In the **Share Settings** row select **Expand**
4. Select **Share**
 = Shared with the app and can be removed or is being shared but not used by another app
No trash icon = table is being shared in another app or portal
{% endhint %}
= Shared with the app and can be removed or is being shared but not used by another app
No trash icon = table is being shared in another app or portal
{% endhint %}